Need to take screenshots, scrape web pages, generate PDFs, or automate browser interactions inside your n8n workflows? The Puppeteer community node makes all of this possible — and you can install it in under a minute.
This tutorial walks you through the full process: finding the package, installing it on your n8n instance, connecting a remote browser, and capturing your first screenshot.
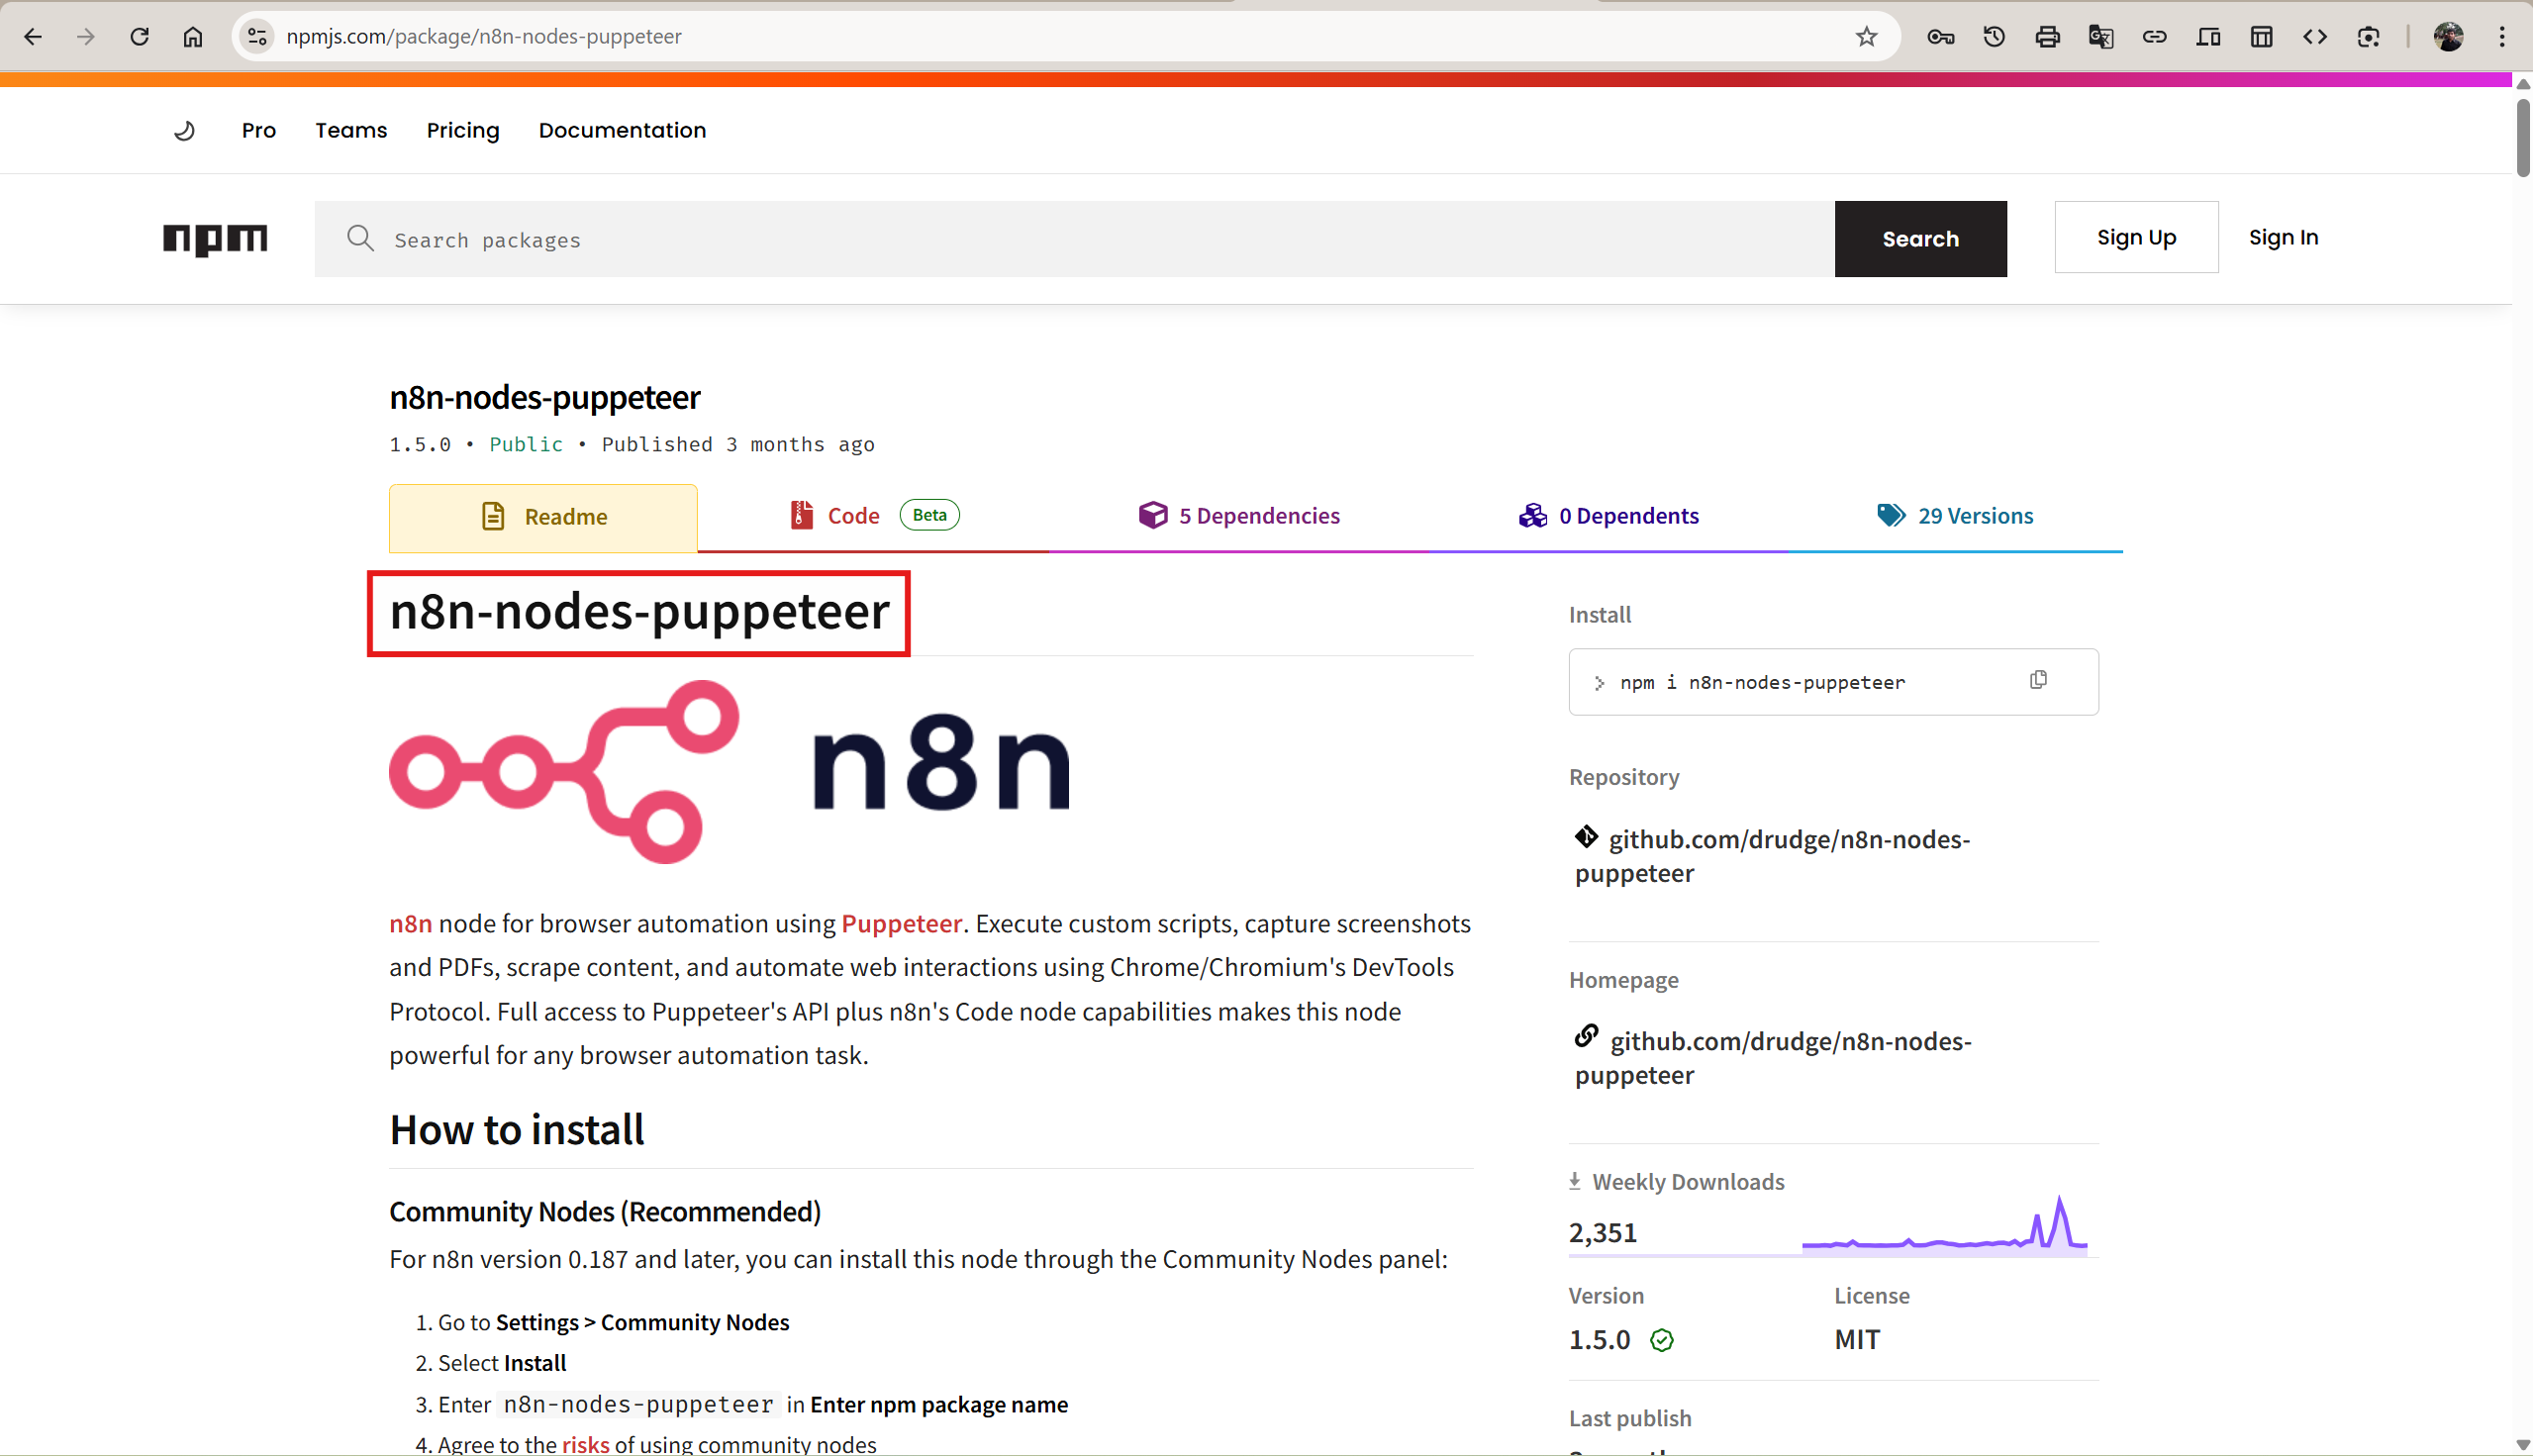
What Is n8n-nodes-puppeteer?
n8n-nodes-puppeteer is a community-built node that brings Puppeteer — Google's headless browser automation library — directly into n8n. It gives you four powerful operations:
- Get Page Content — Extract the full HTML of any web page
- Get PDF — Convert a page to a downloadable PDF document
- Get Screenshot — Capture a PNG, JPEG, or WebP image of a page
- Run Custom Script — Execute arbitrary Puppeteer code for complex automations
The package is open-source (MIT license), actively maintained, and has over 480,000 downloads on npm.
Step 1 — Open Community Nodes Settings
Log in to your n8n instance. Click Settings in the bottom-left sidebar, then select Community nodes from the menu.
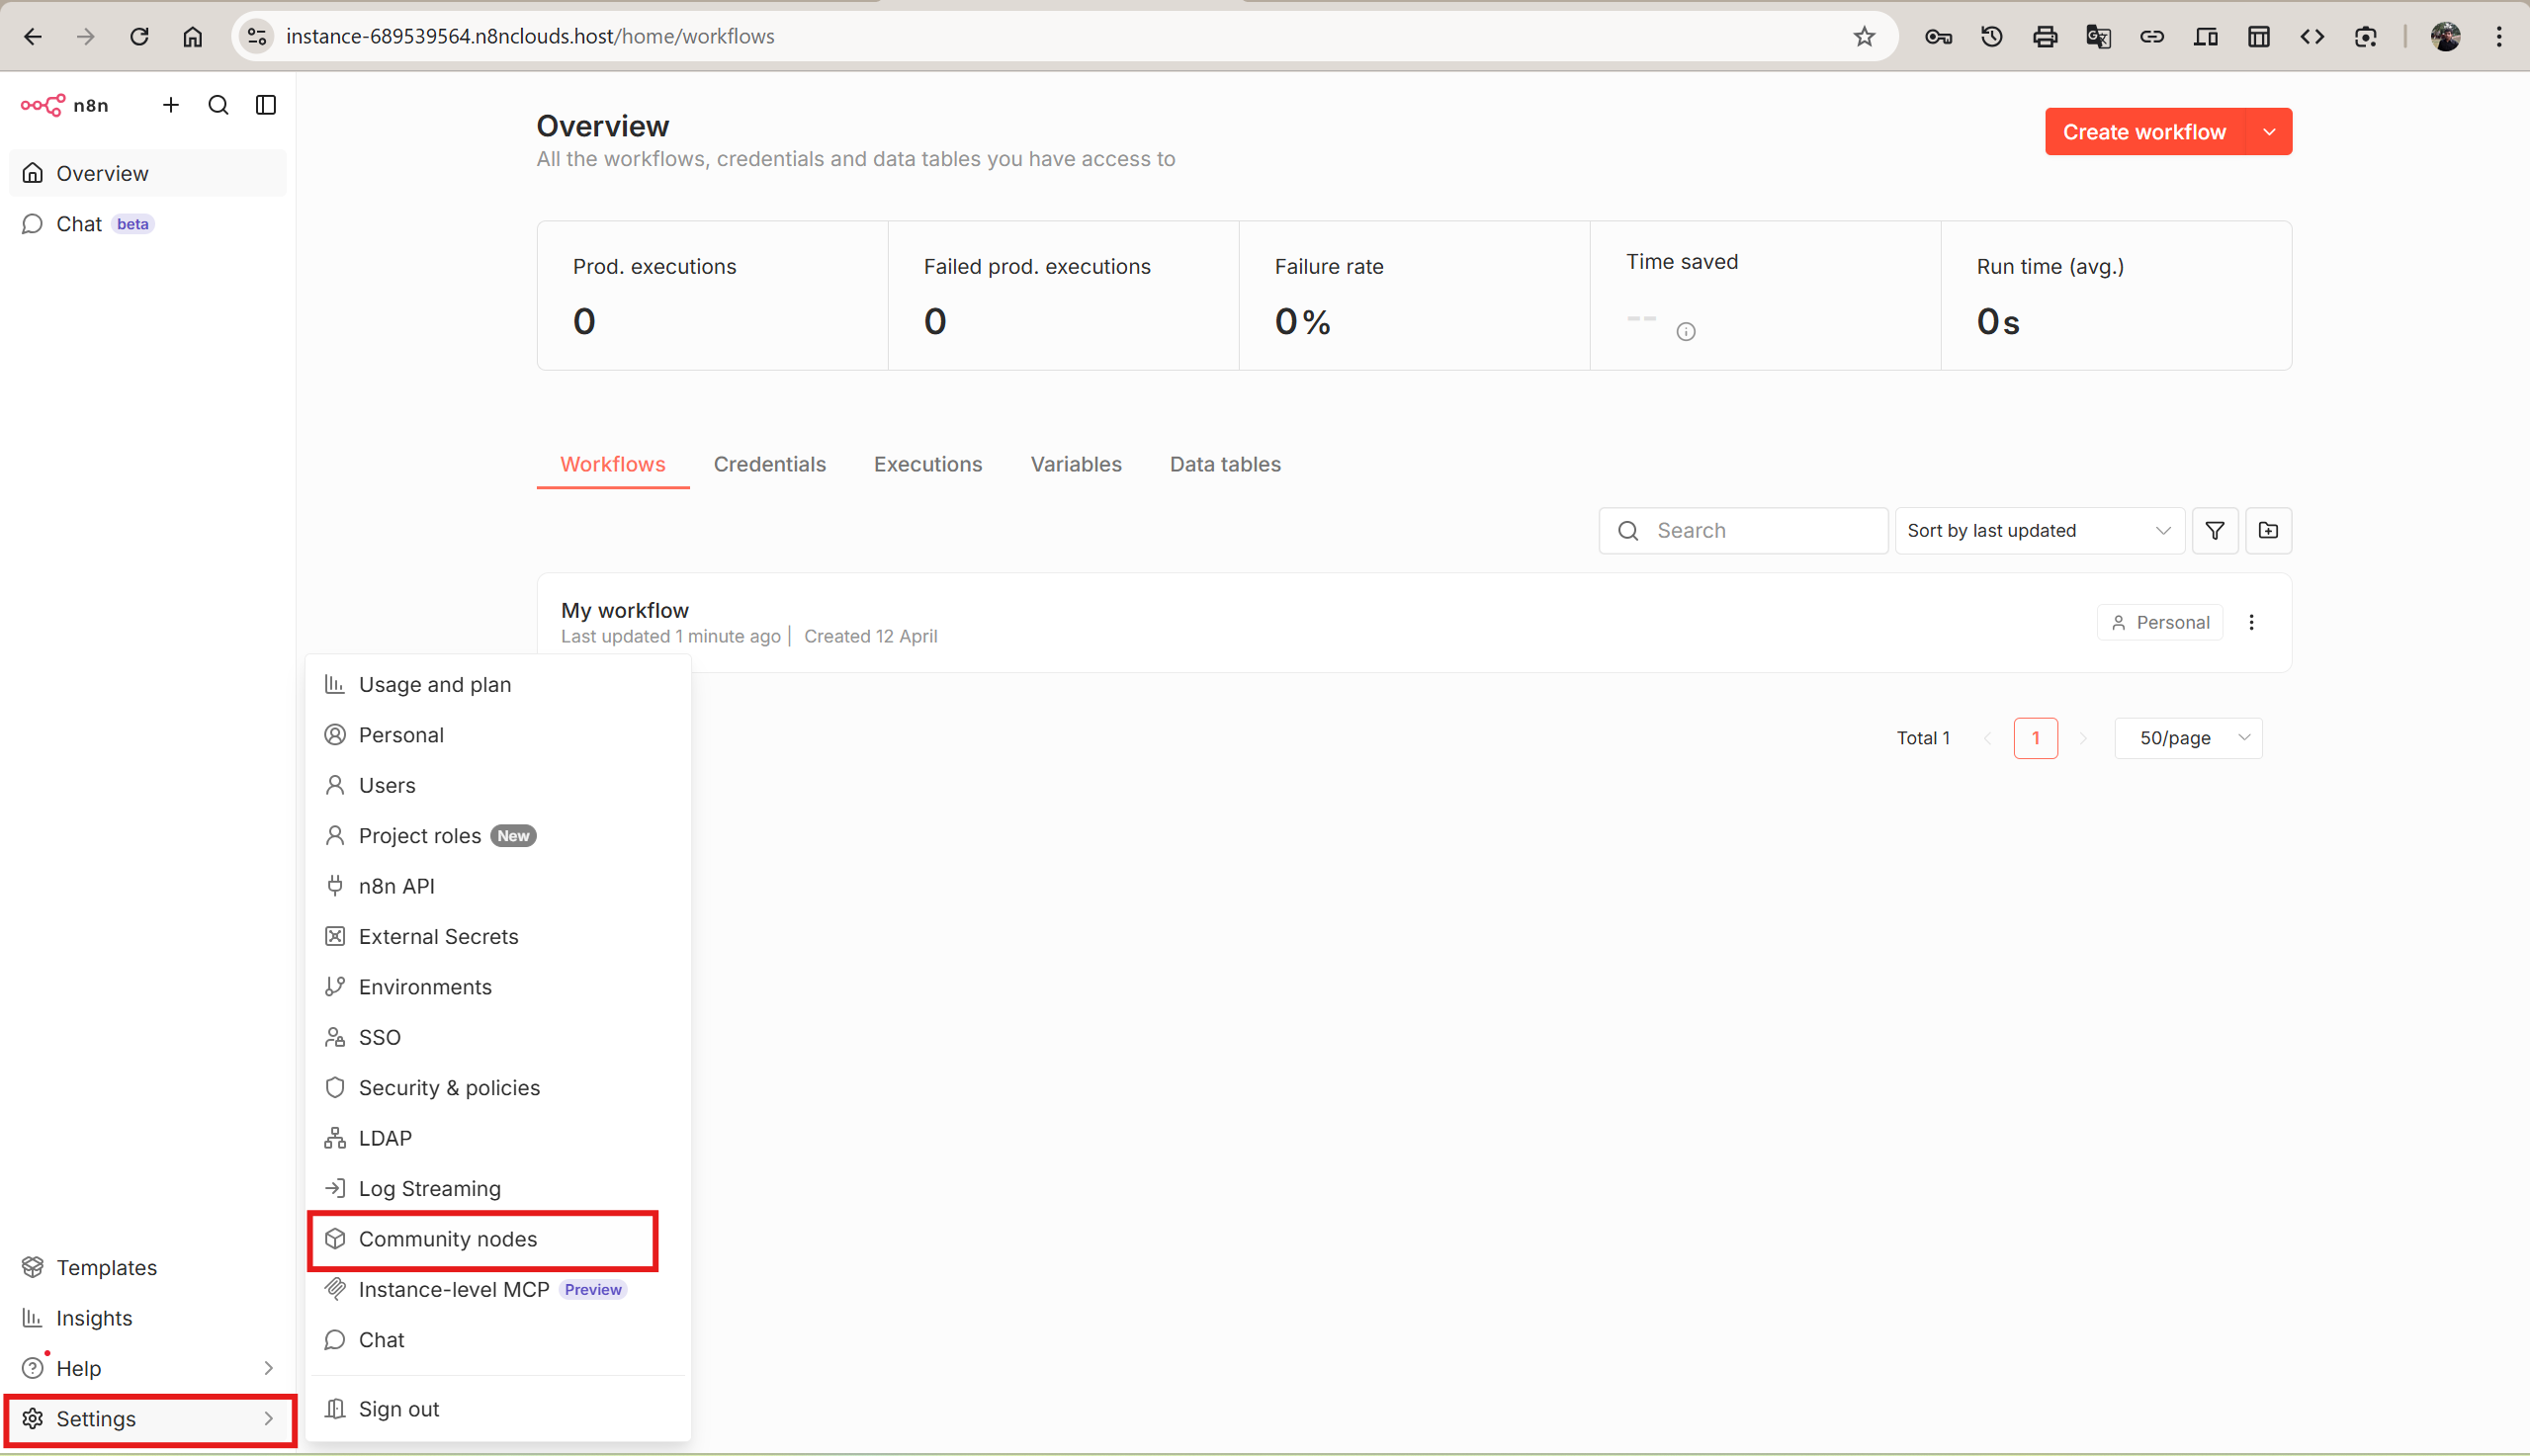
If you have never installed a community node before, you will see an empty state page with an Install a community node button.
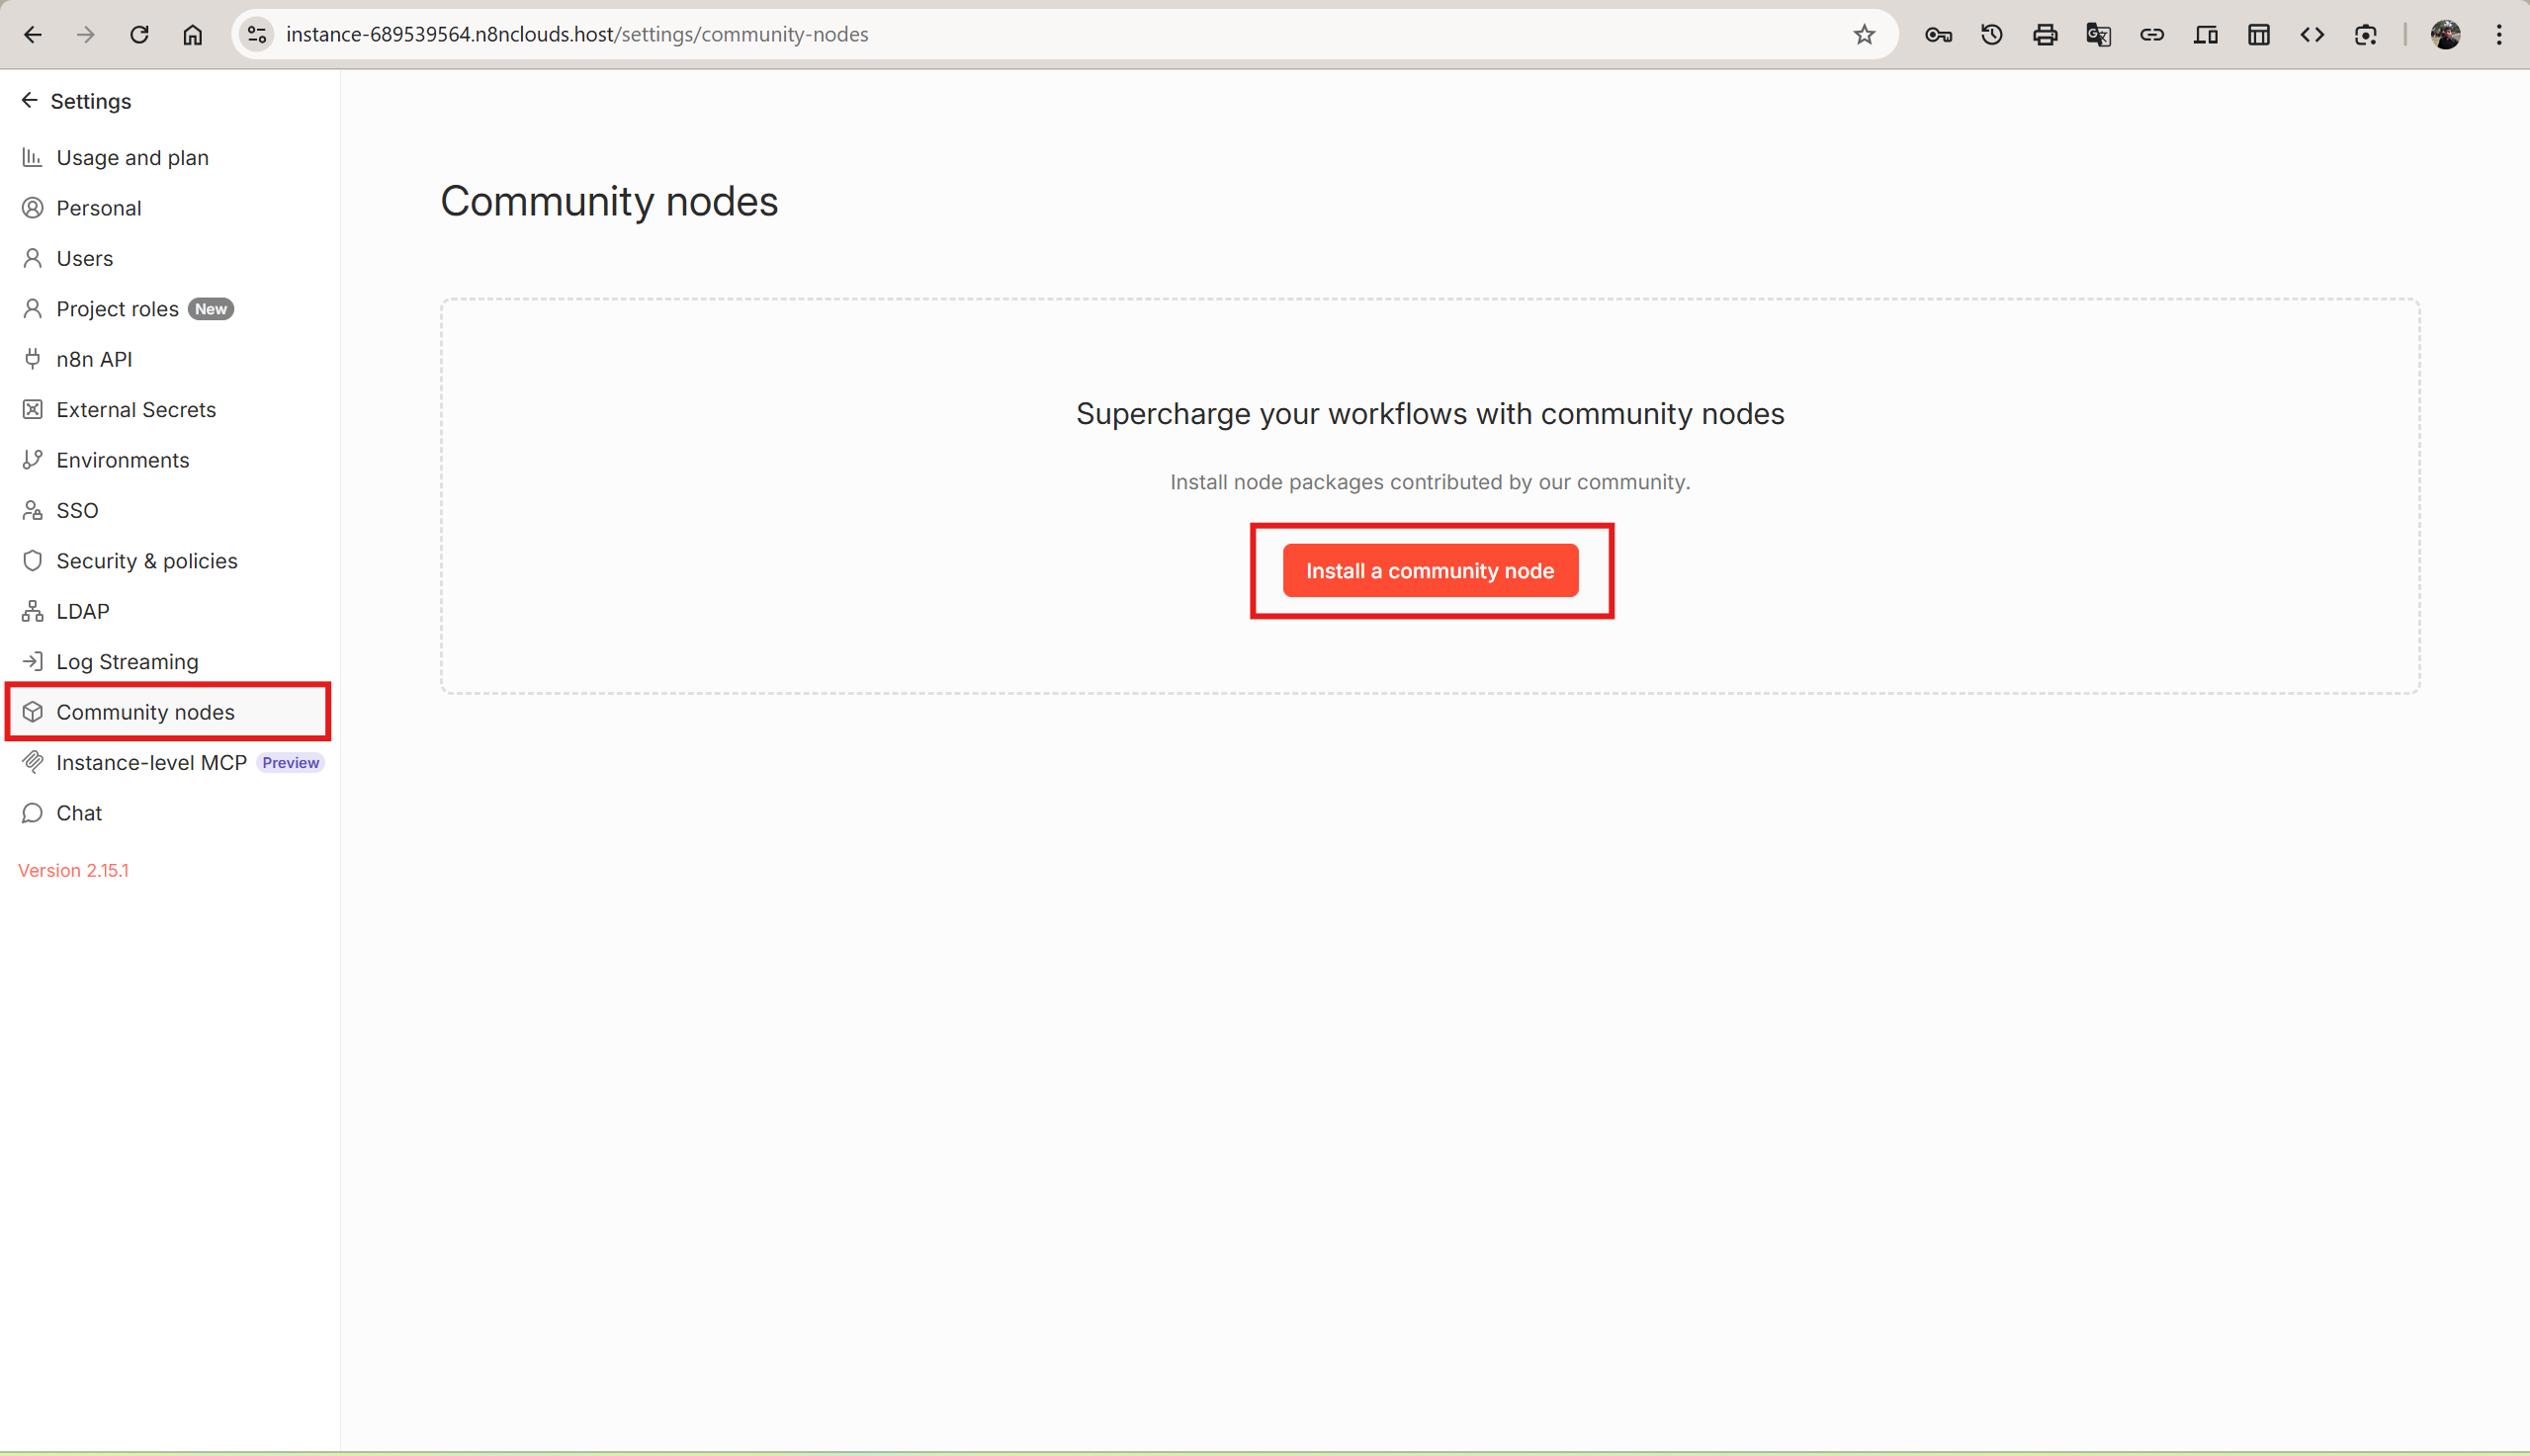
Click Install a community node to open the installation dialog.
Step 2 — Install the Puppeteer Package
In the installation dialog:
- Enter
n8n-nodes-puppeteerin the npm Package Name field - Check the box to acknowledge the risks of installing unverified community code
- Click Install
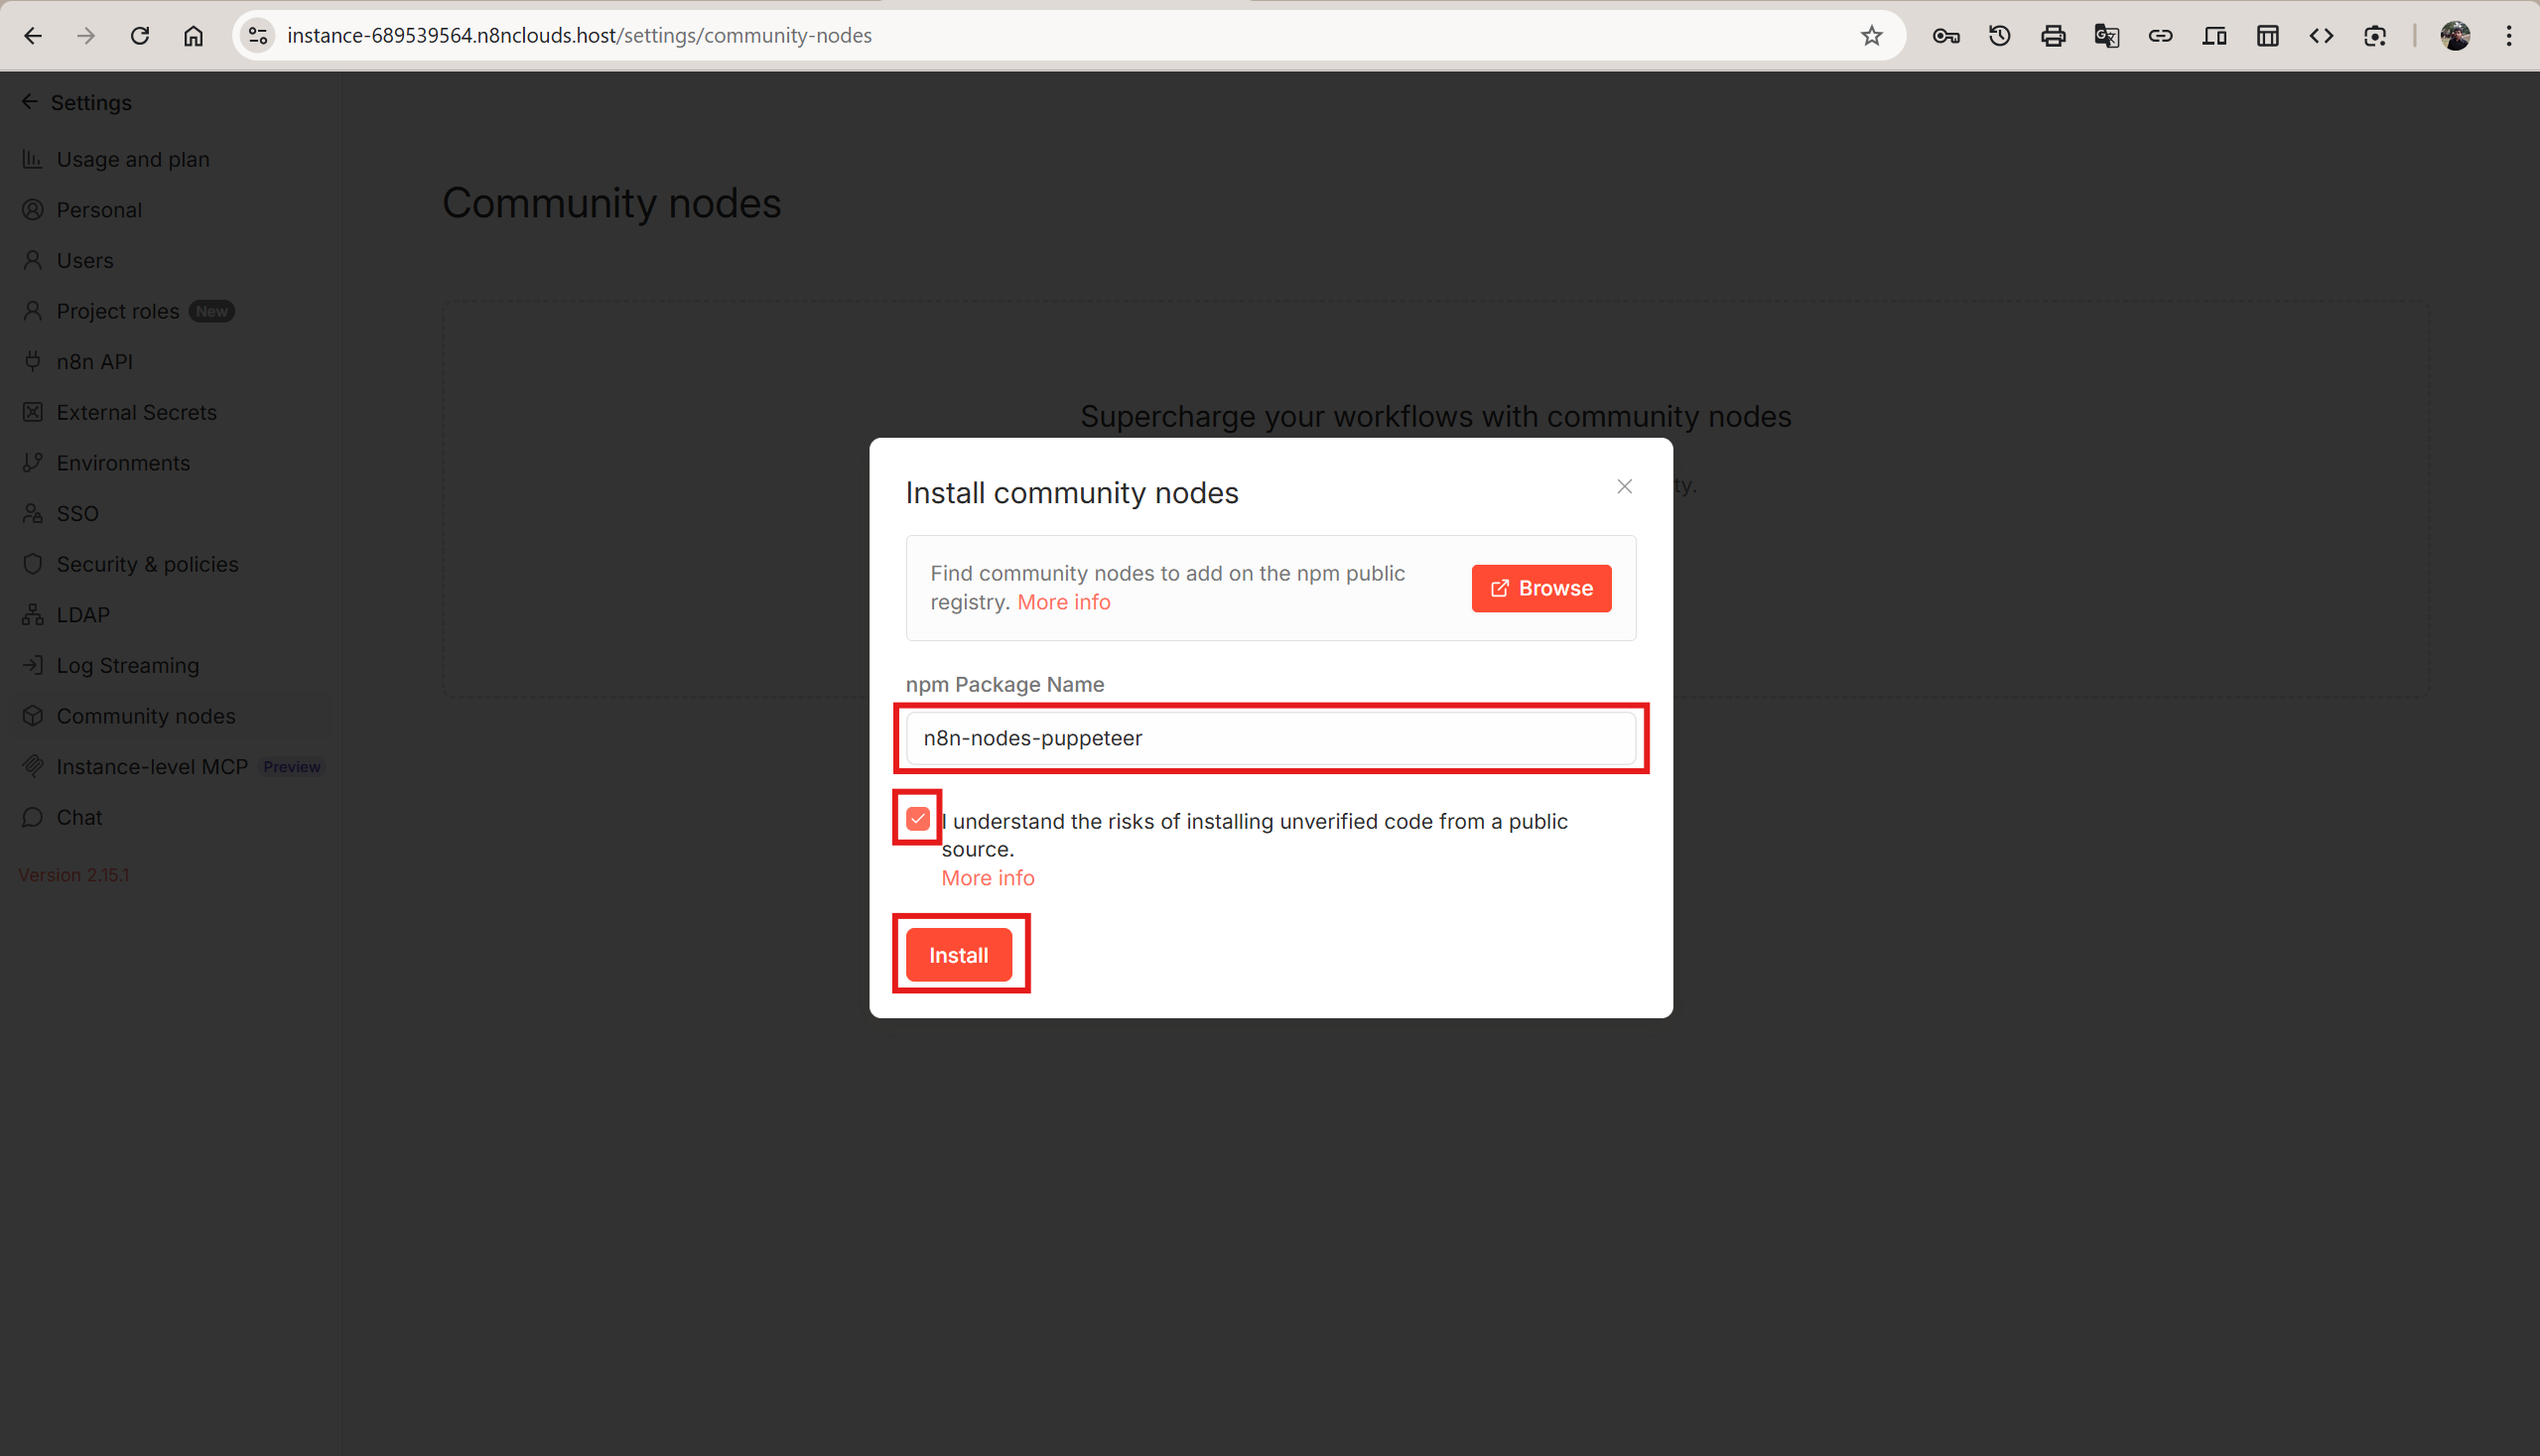
n8n will download and install the package. This usually takes 10–30 seconds depending on your instance's internet speed.
Step 3 — Verify the Installation
After installation completes, the Community nodes page will show n8n-nodes-puppeteer in the list with its version number.
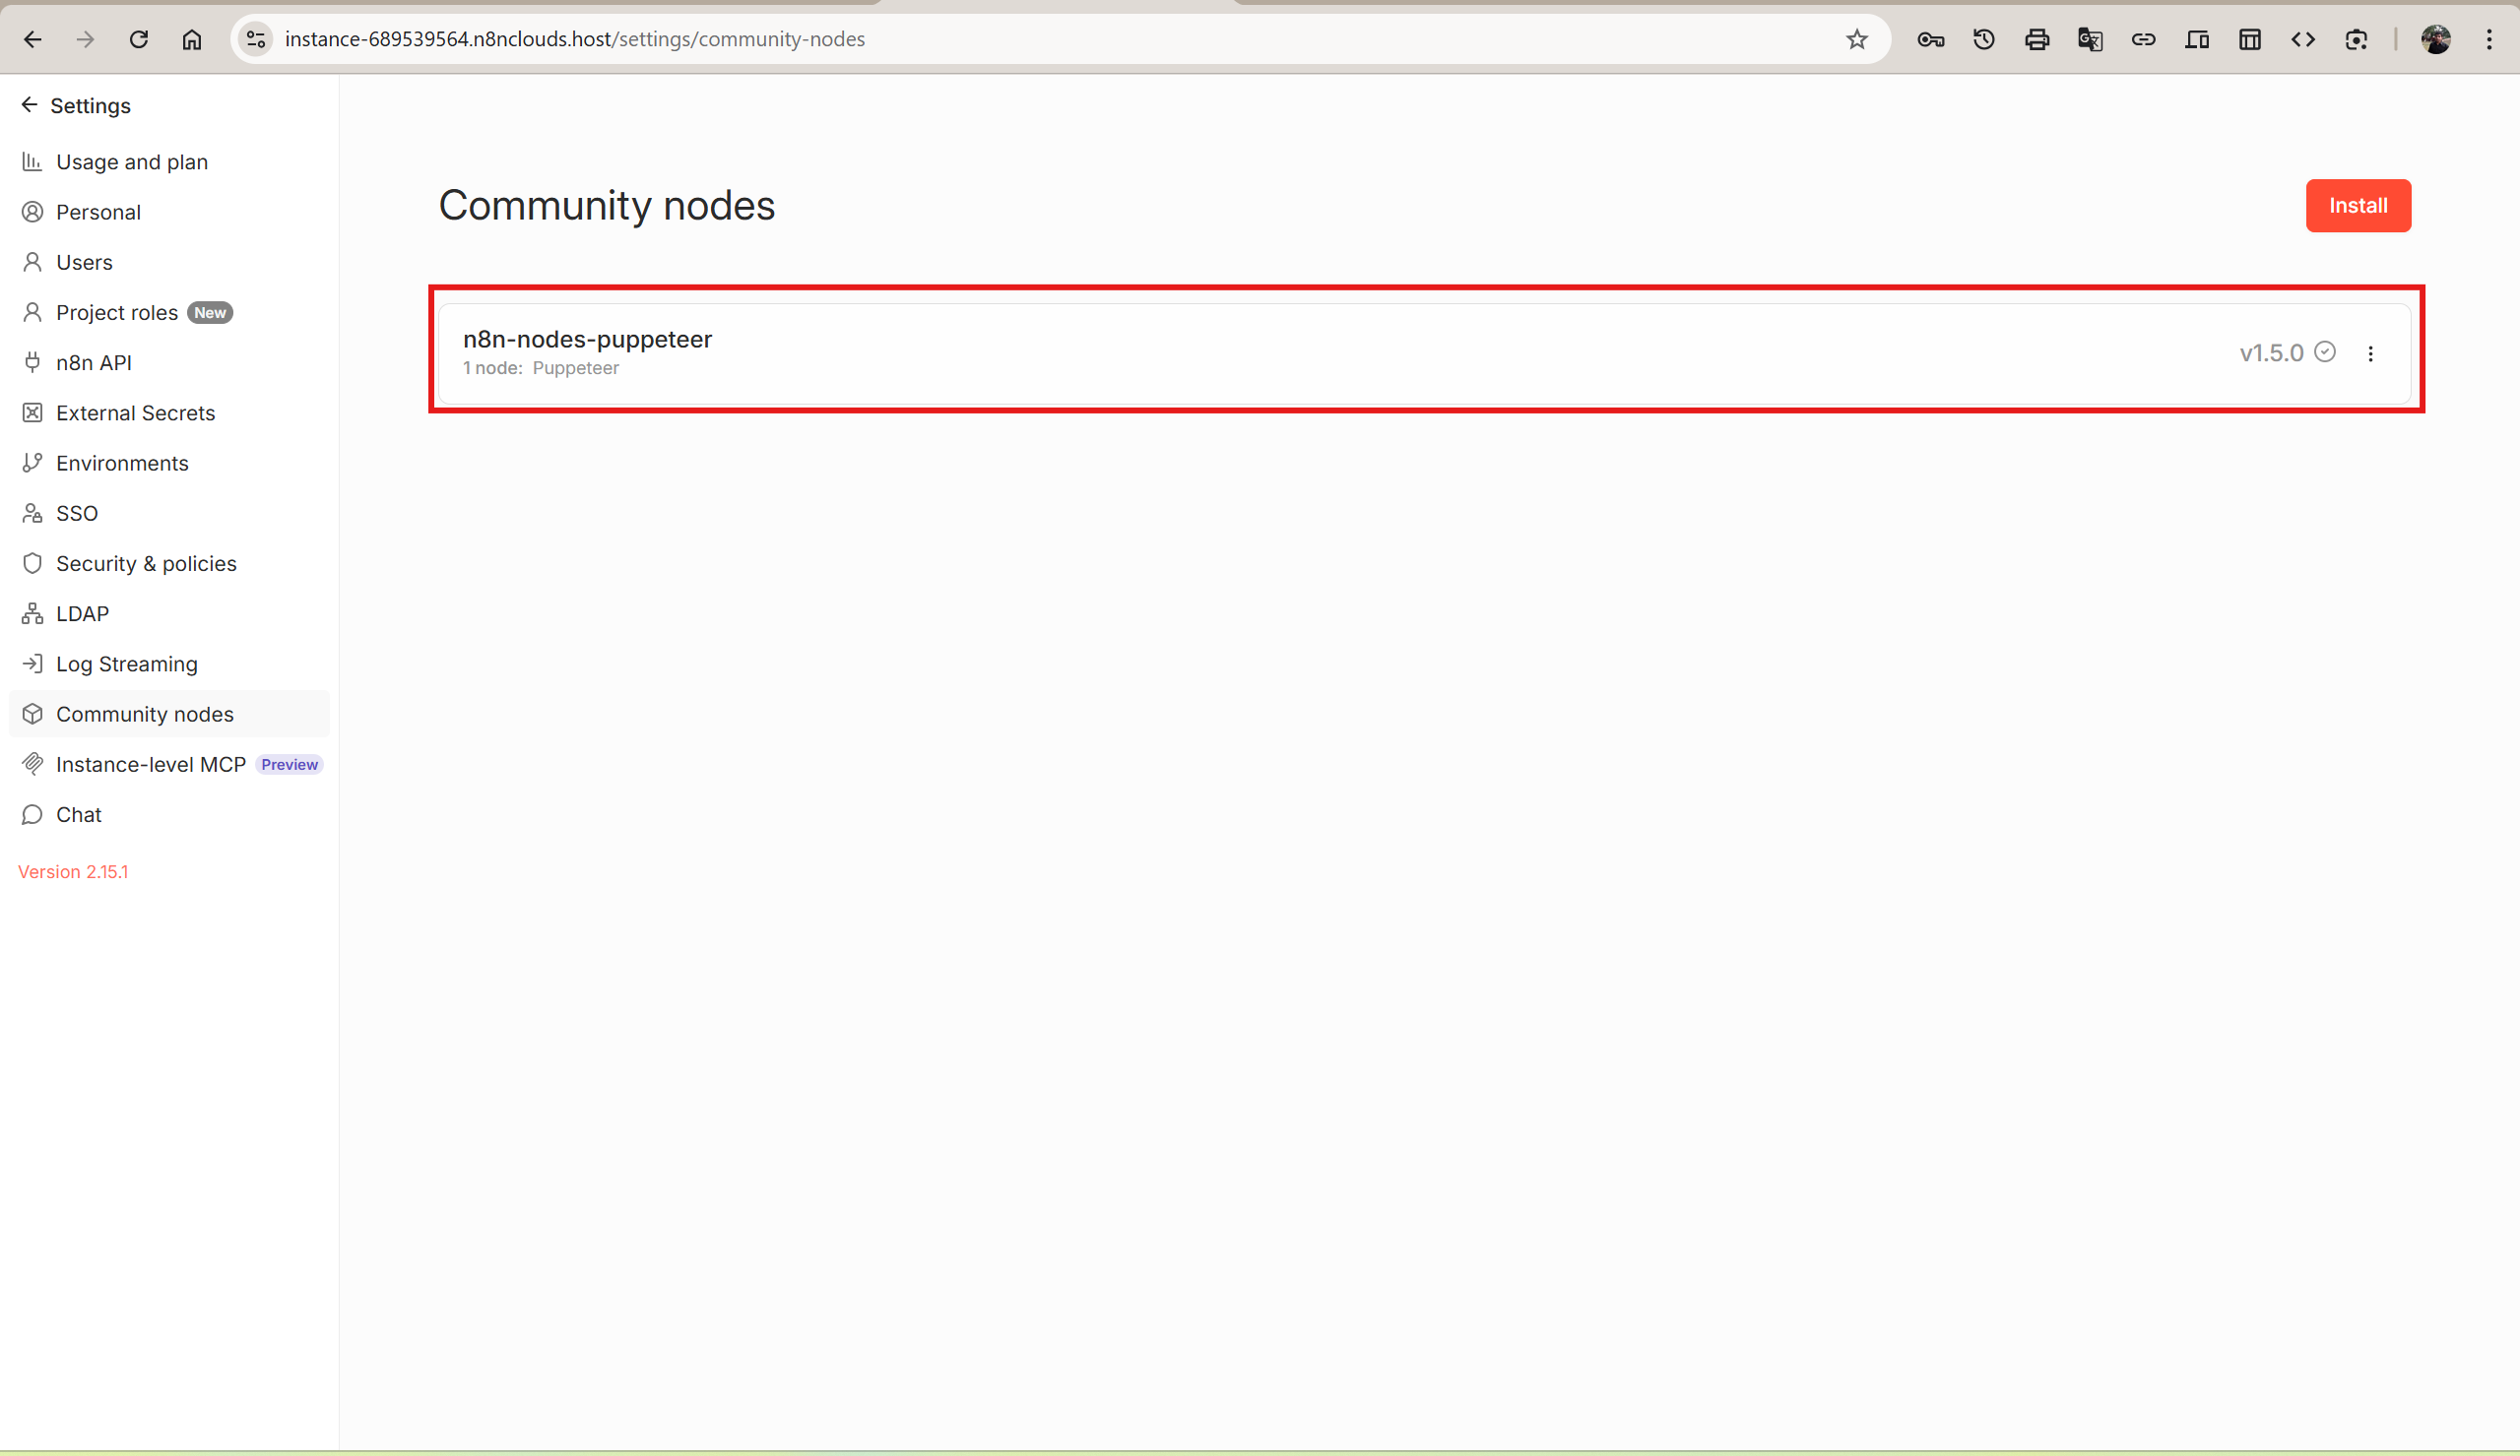
The Puppeteer node is now available across all workflows on your instance.
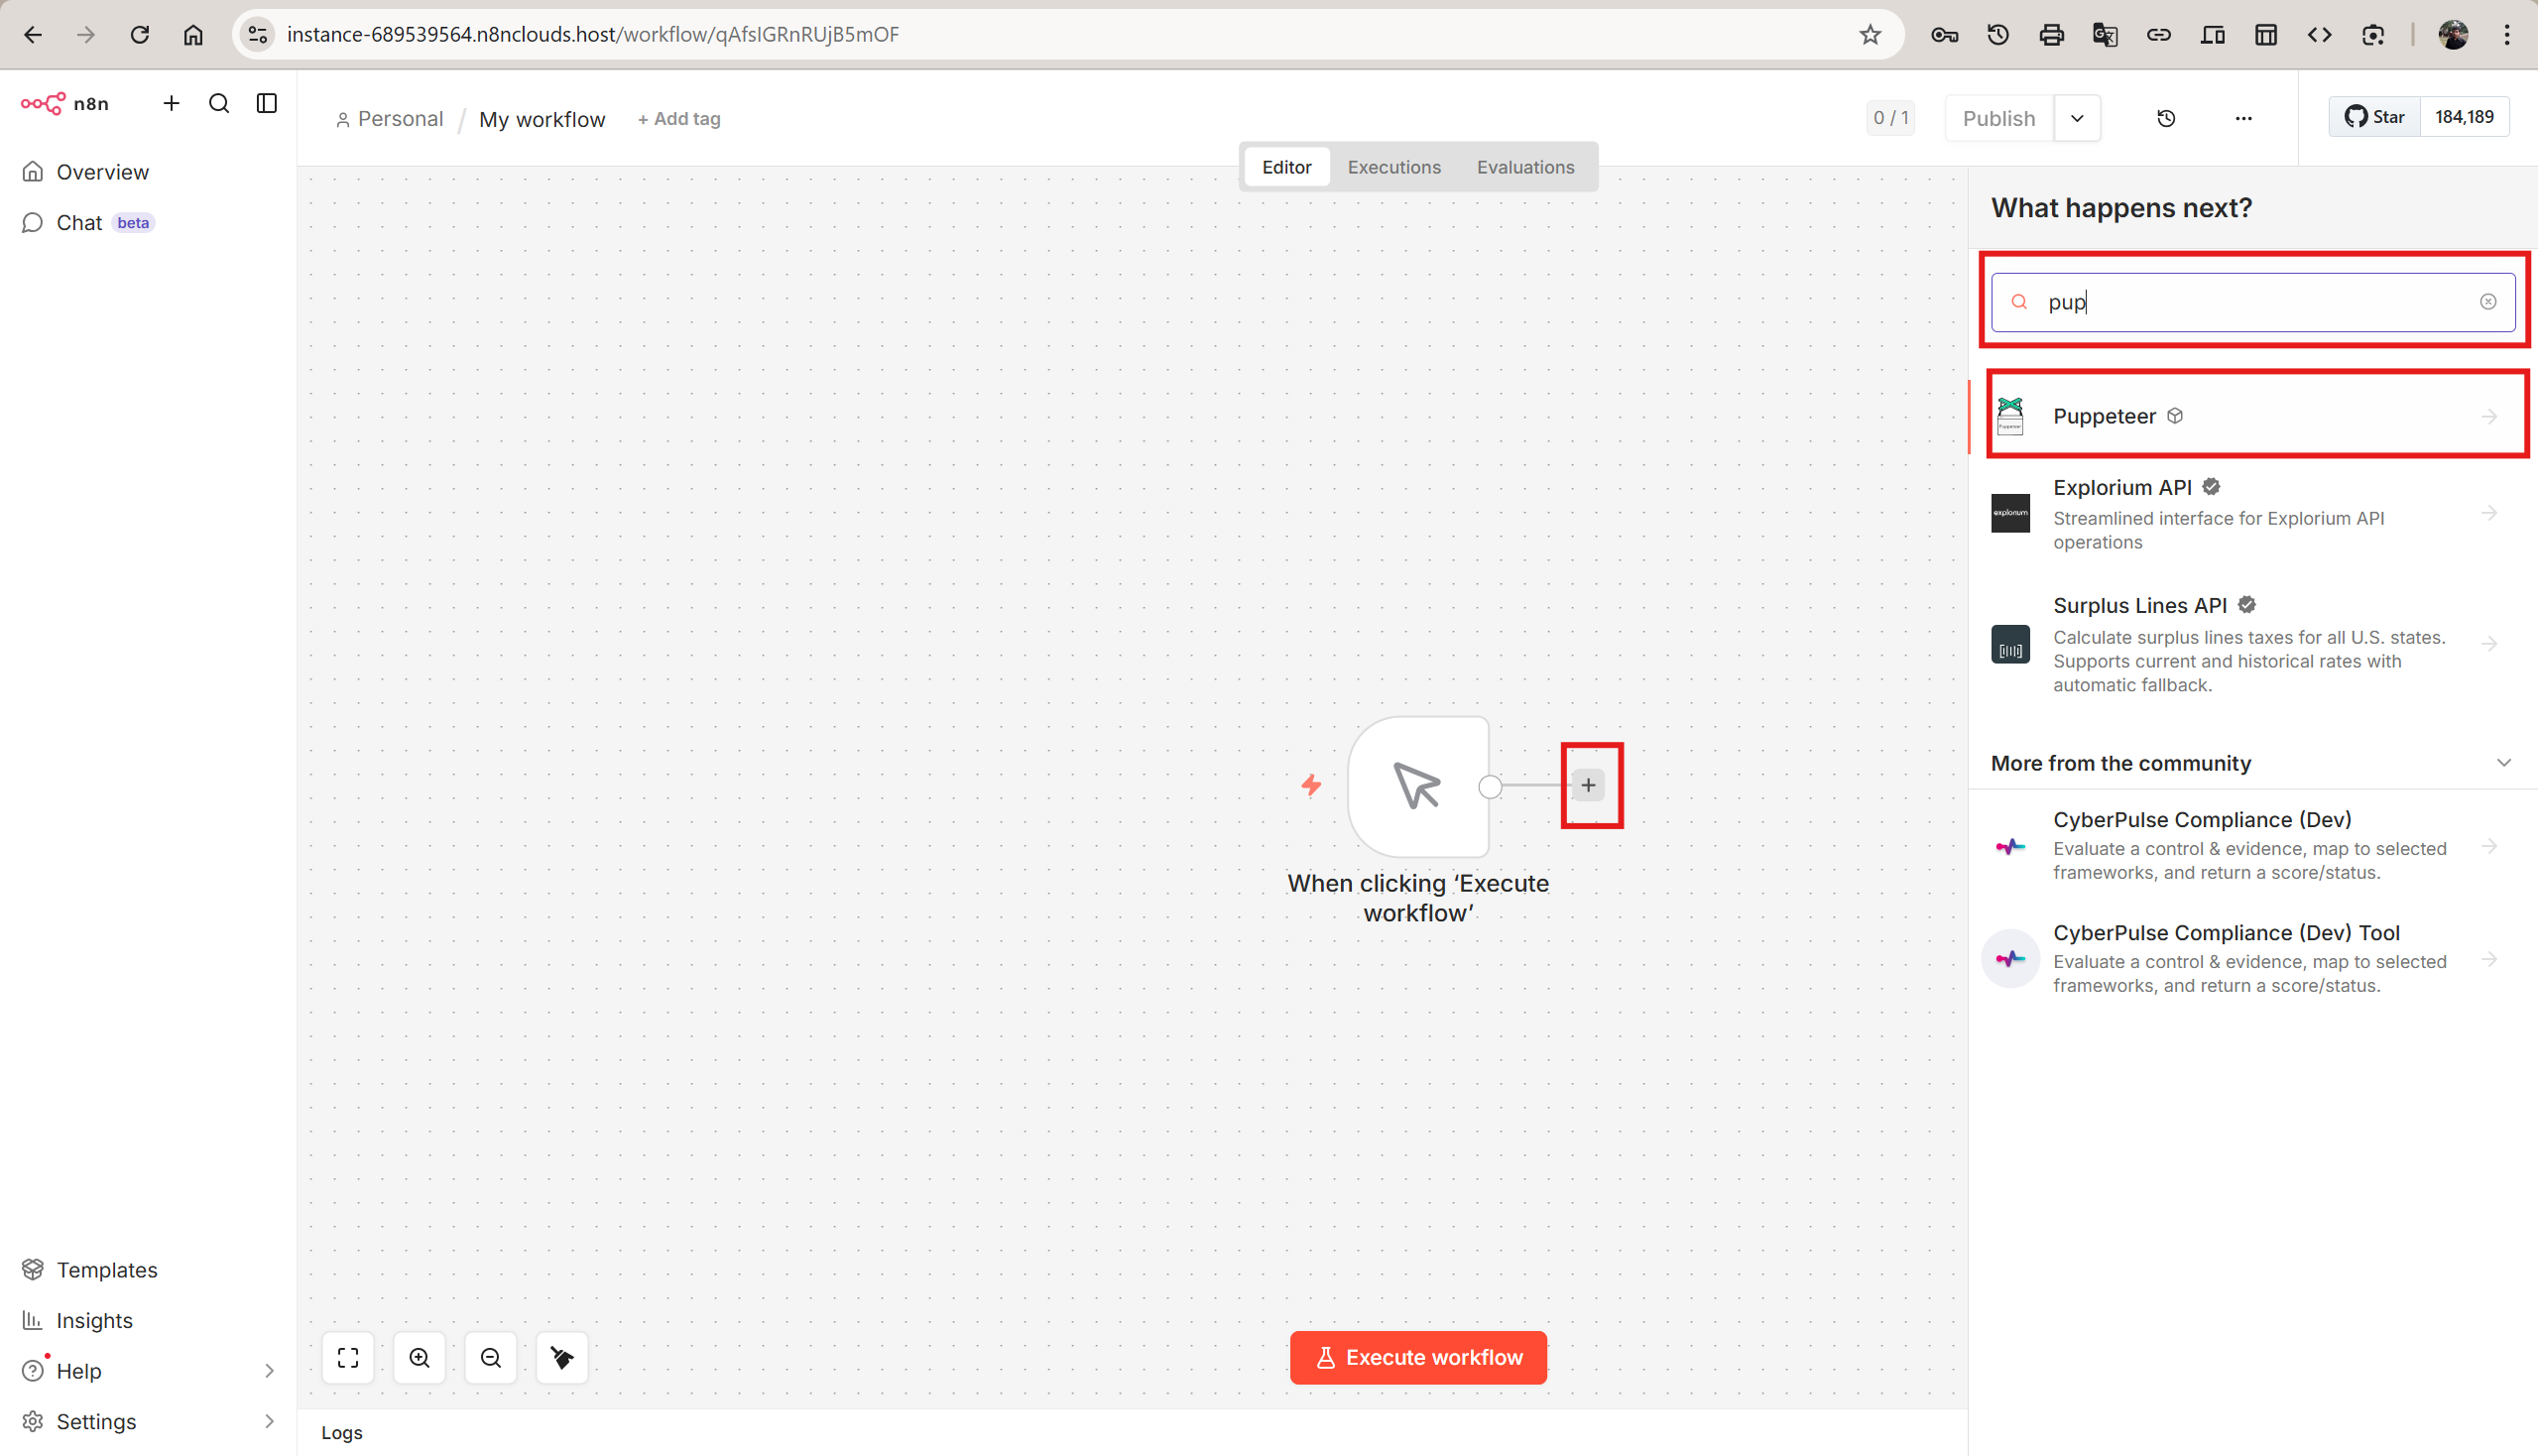
Step 4 — Add the Puppeteer Node to a Workflow
Open any workflow (or create a new one). Click the + button on the canvas to add a new node. Type pup in the search bar — the Puppeteer node will appear at the top of the results with a gear icon (⚙) indicating it is an installed community node.
Click on Puppeteer to see its details. The Node details panel confirms the package is installed and lists all four available actions: Get Page Content, Get PDF, Get Screenshot, and Run Custom Script.
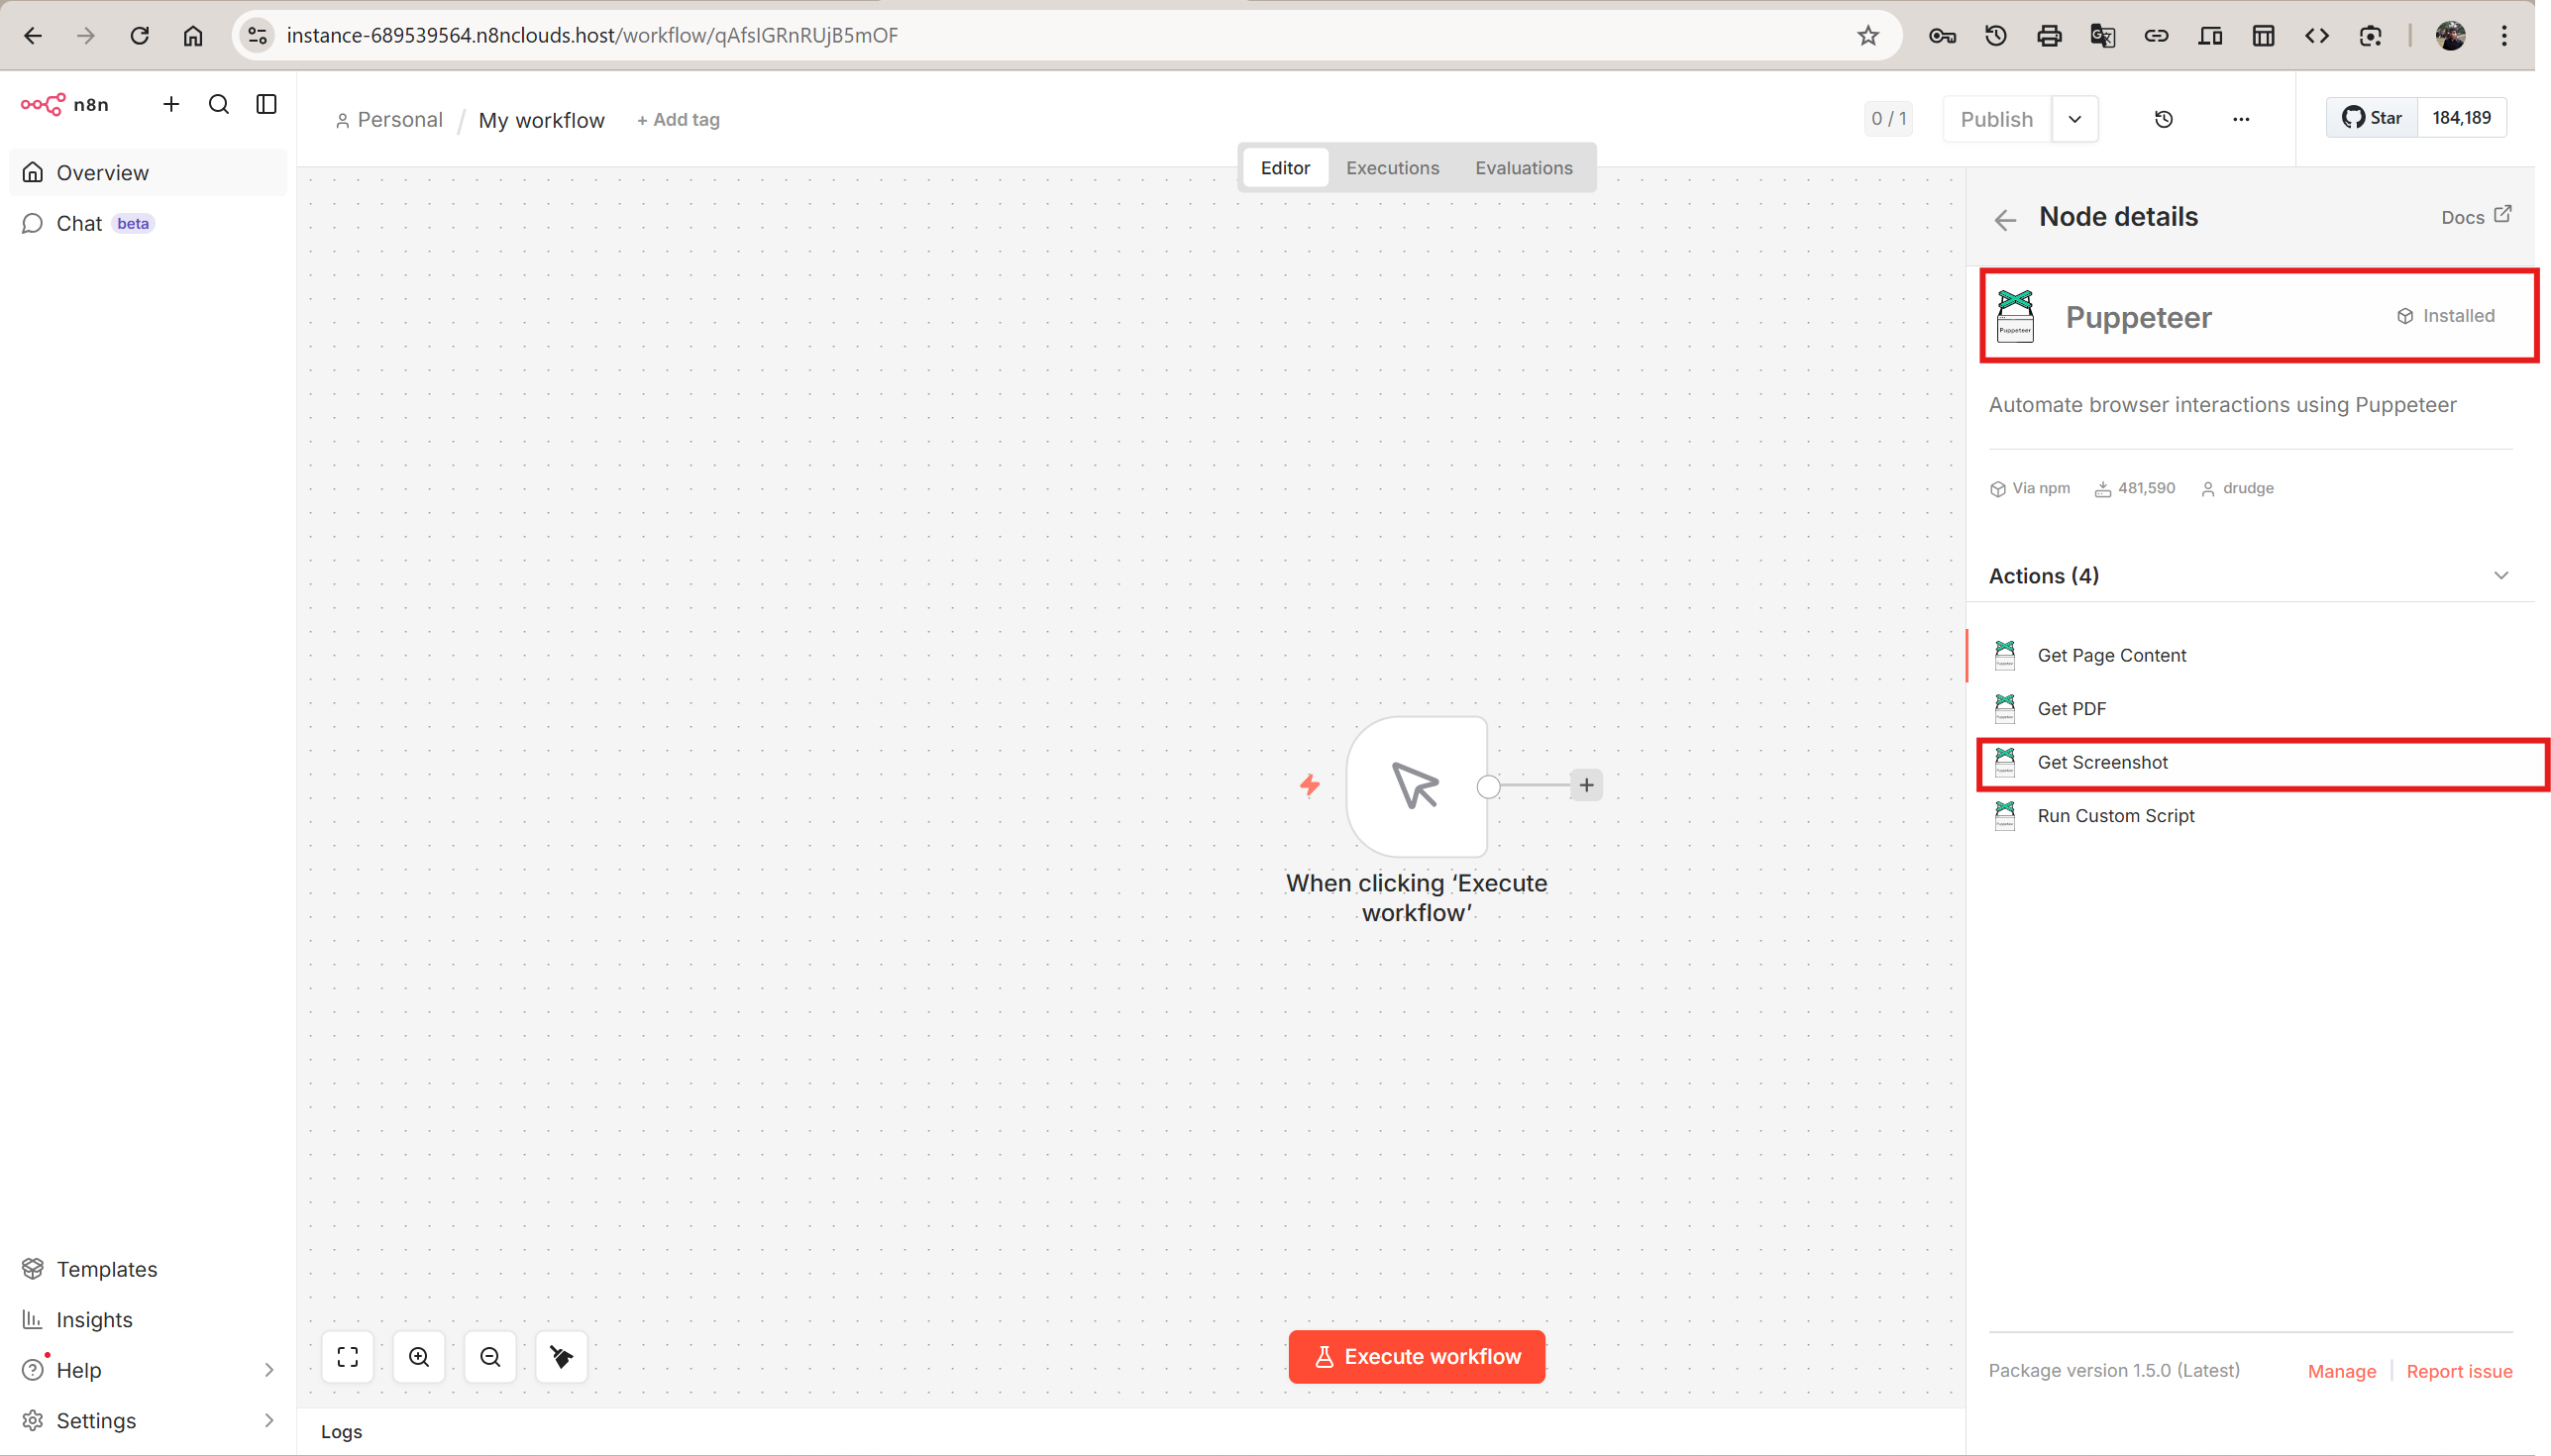
Select Get Screenshot (or any operation you need) to add the node to your workflow.
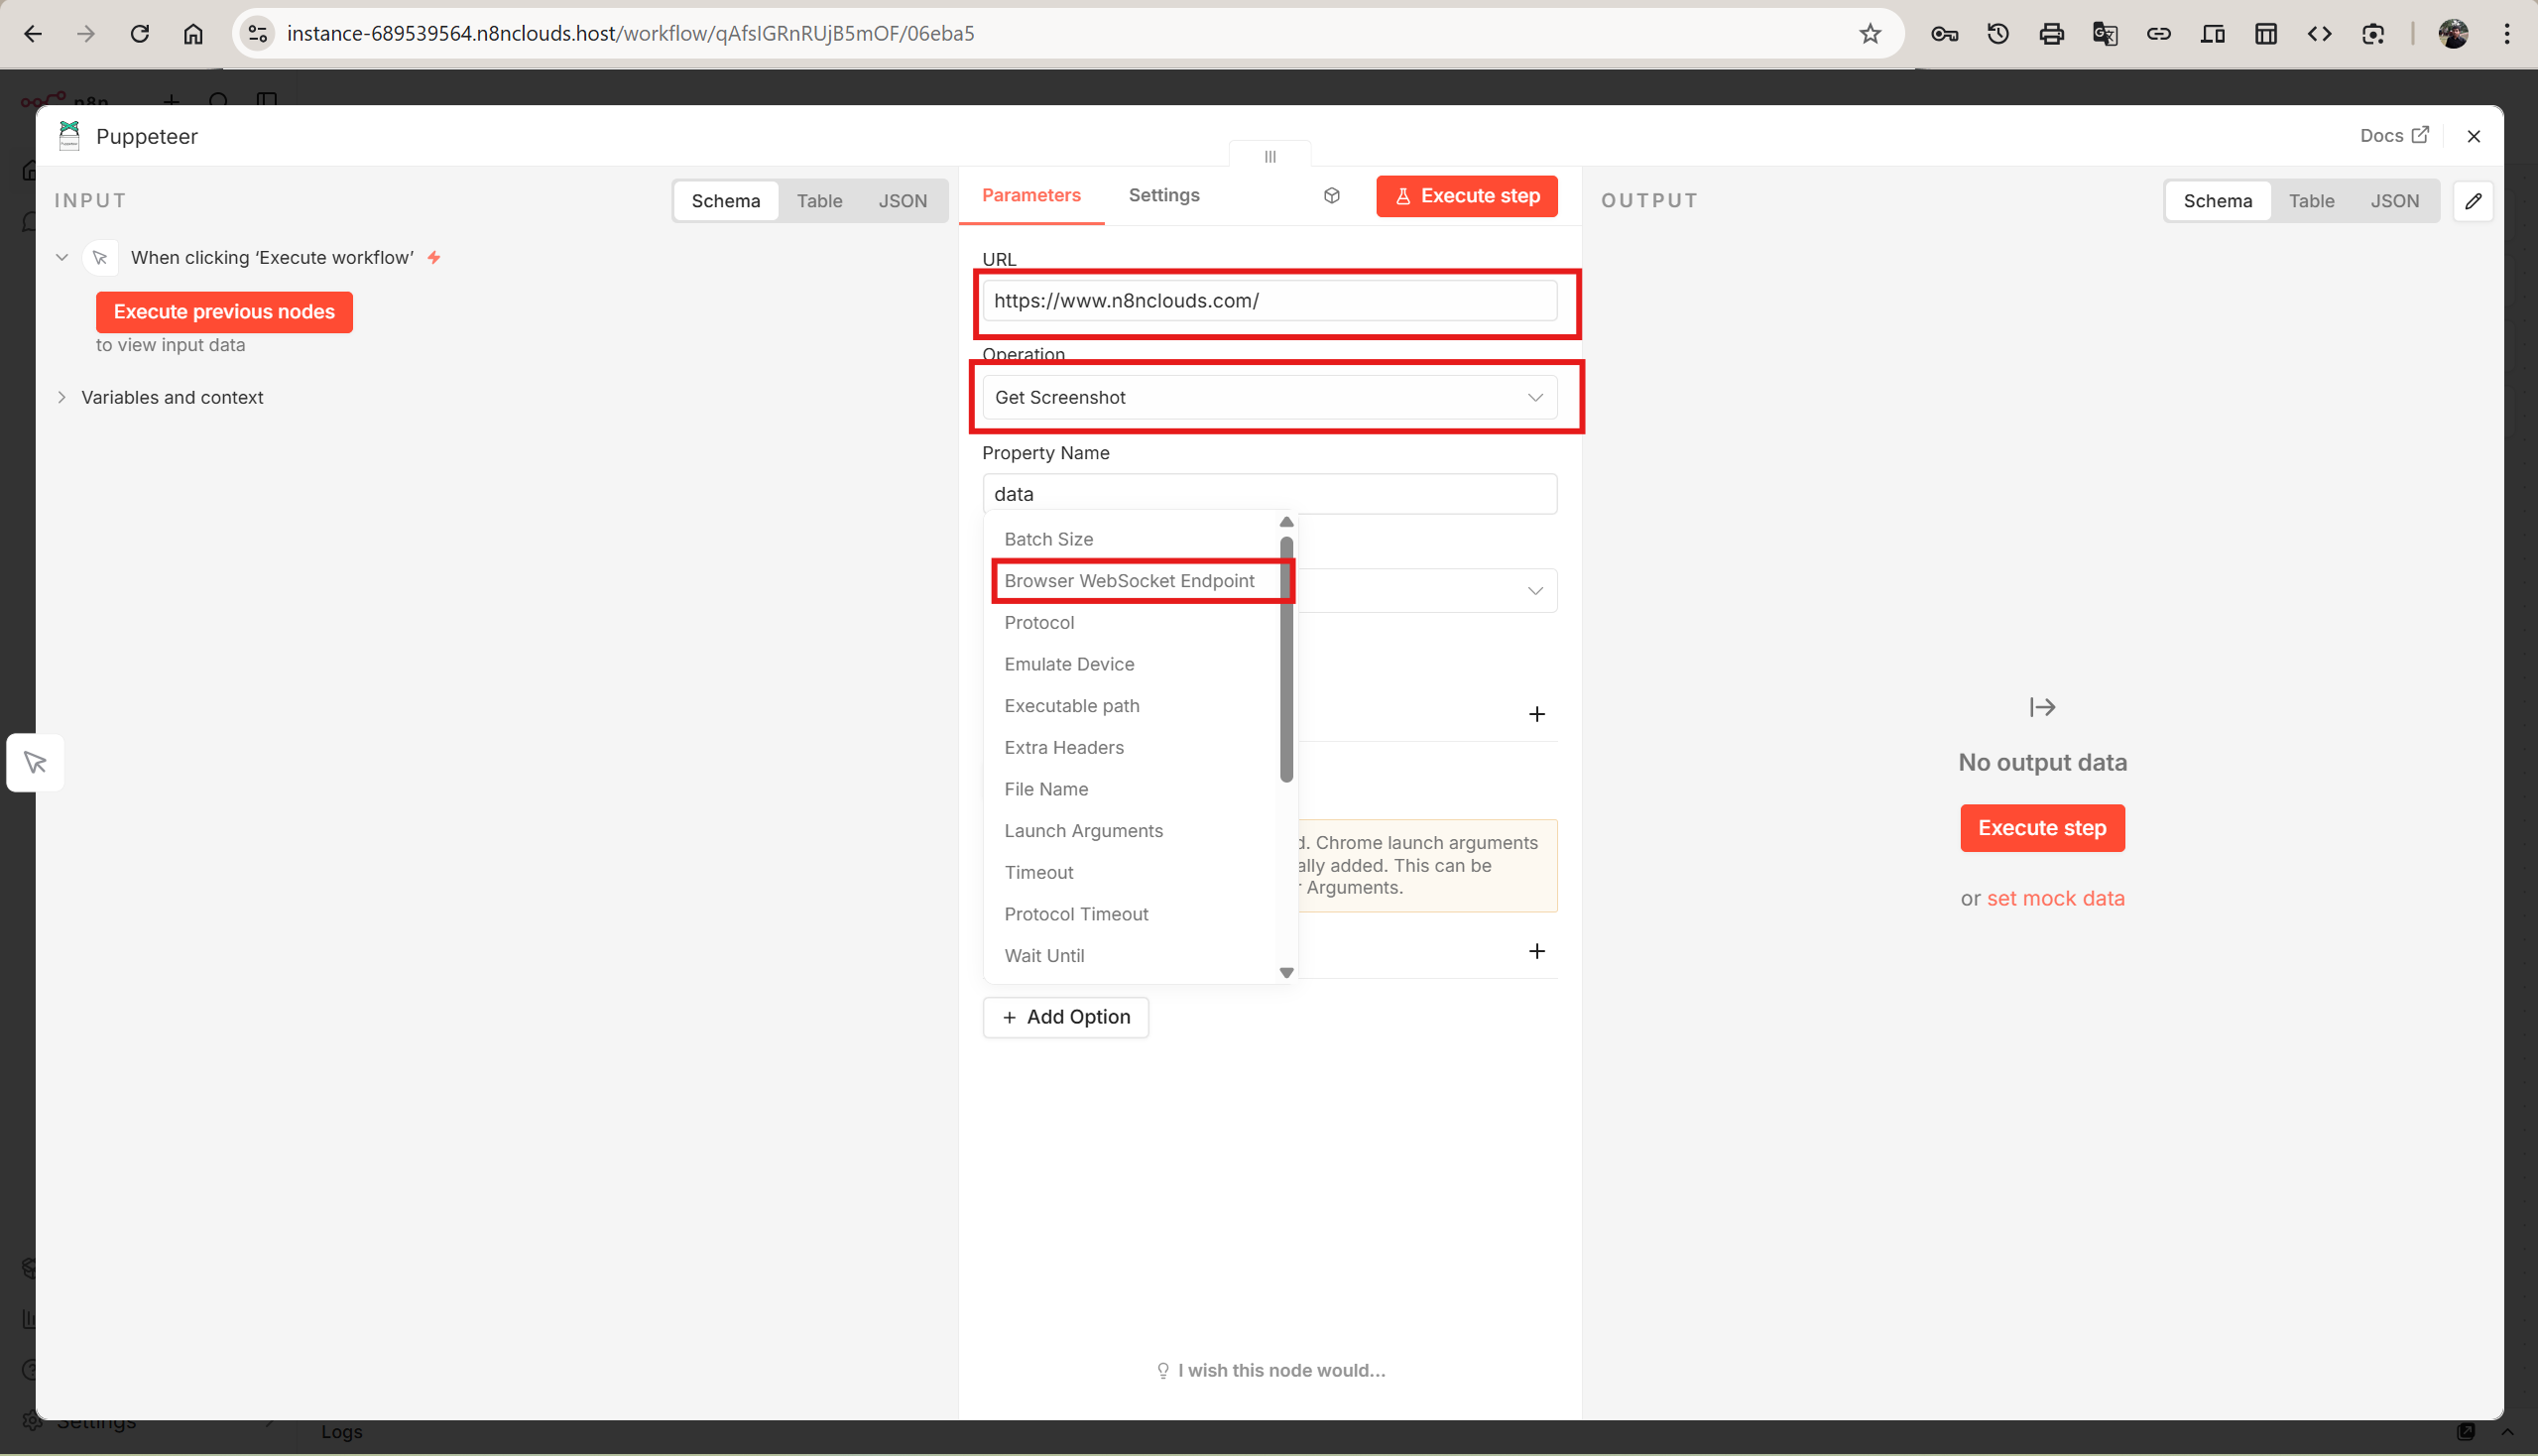
Step 5 — Configure the Puppeteer Node
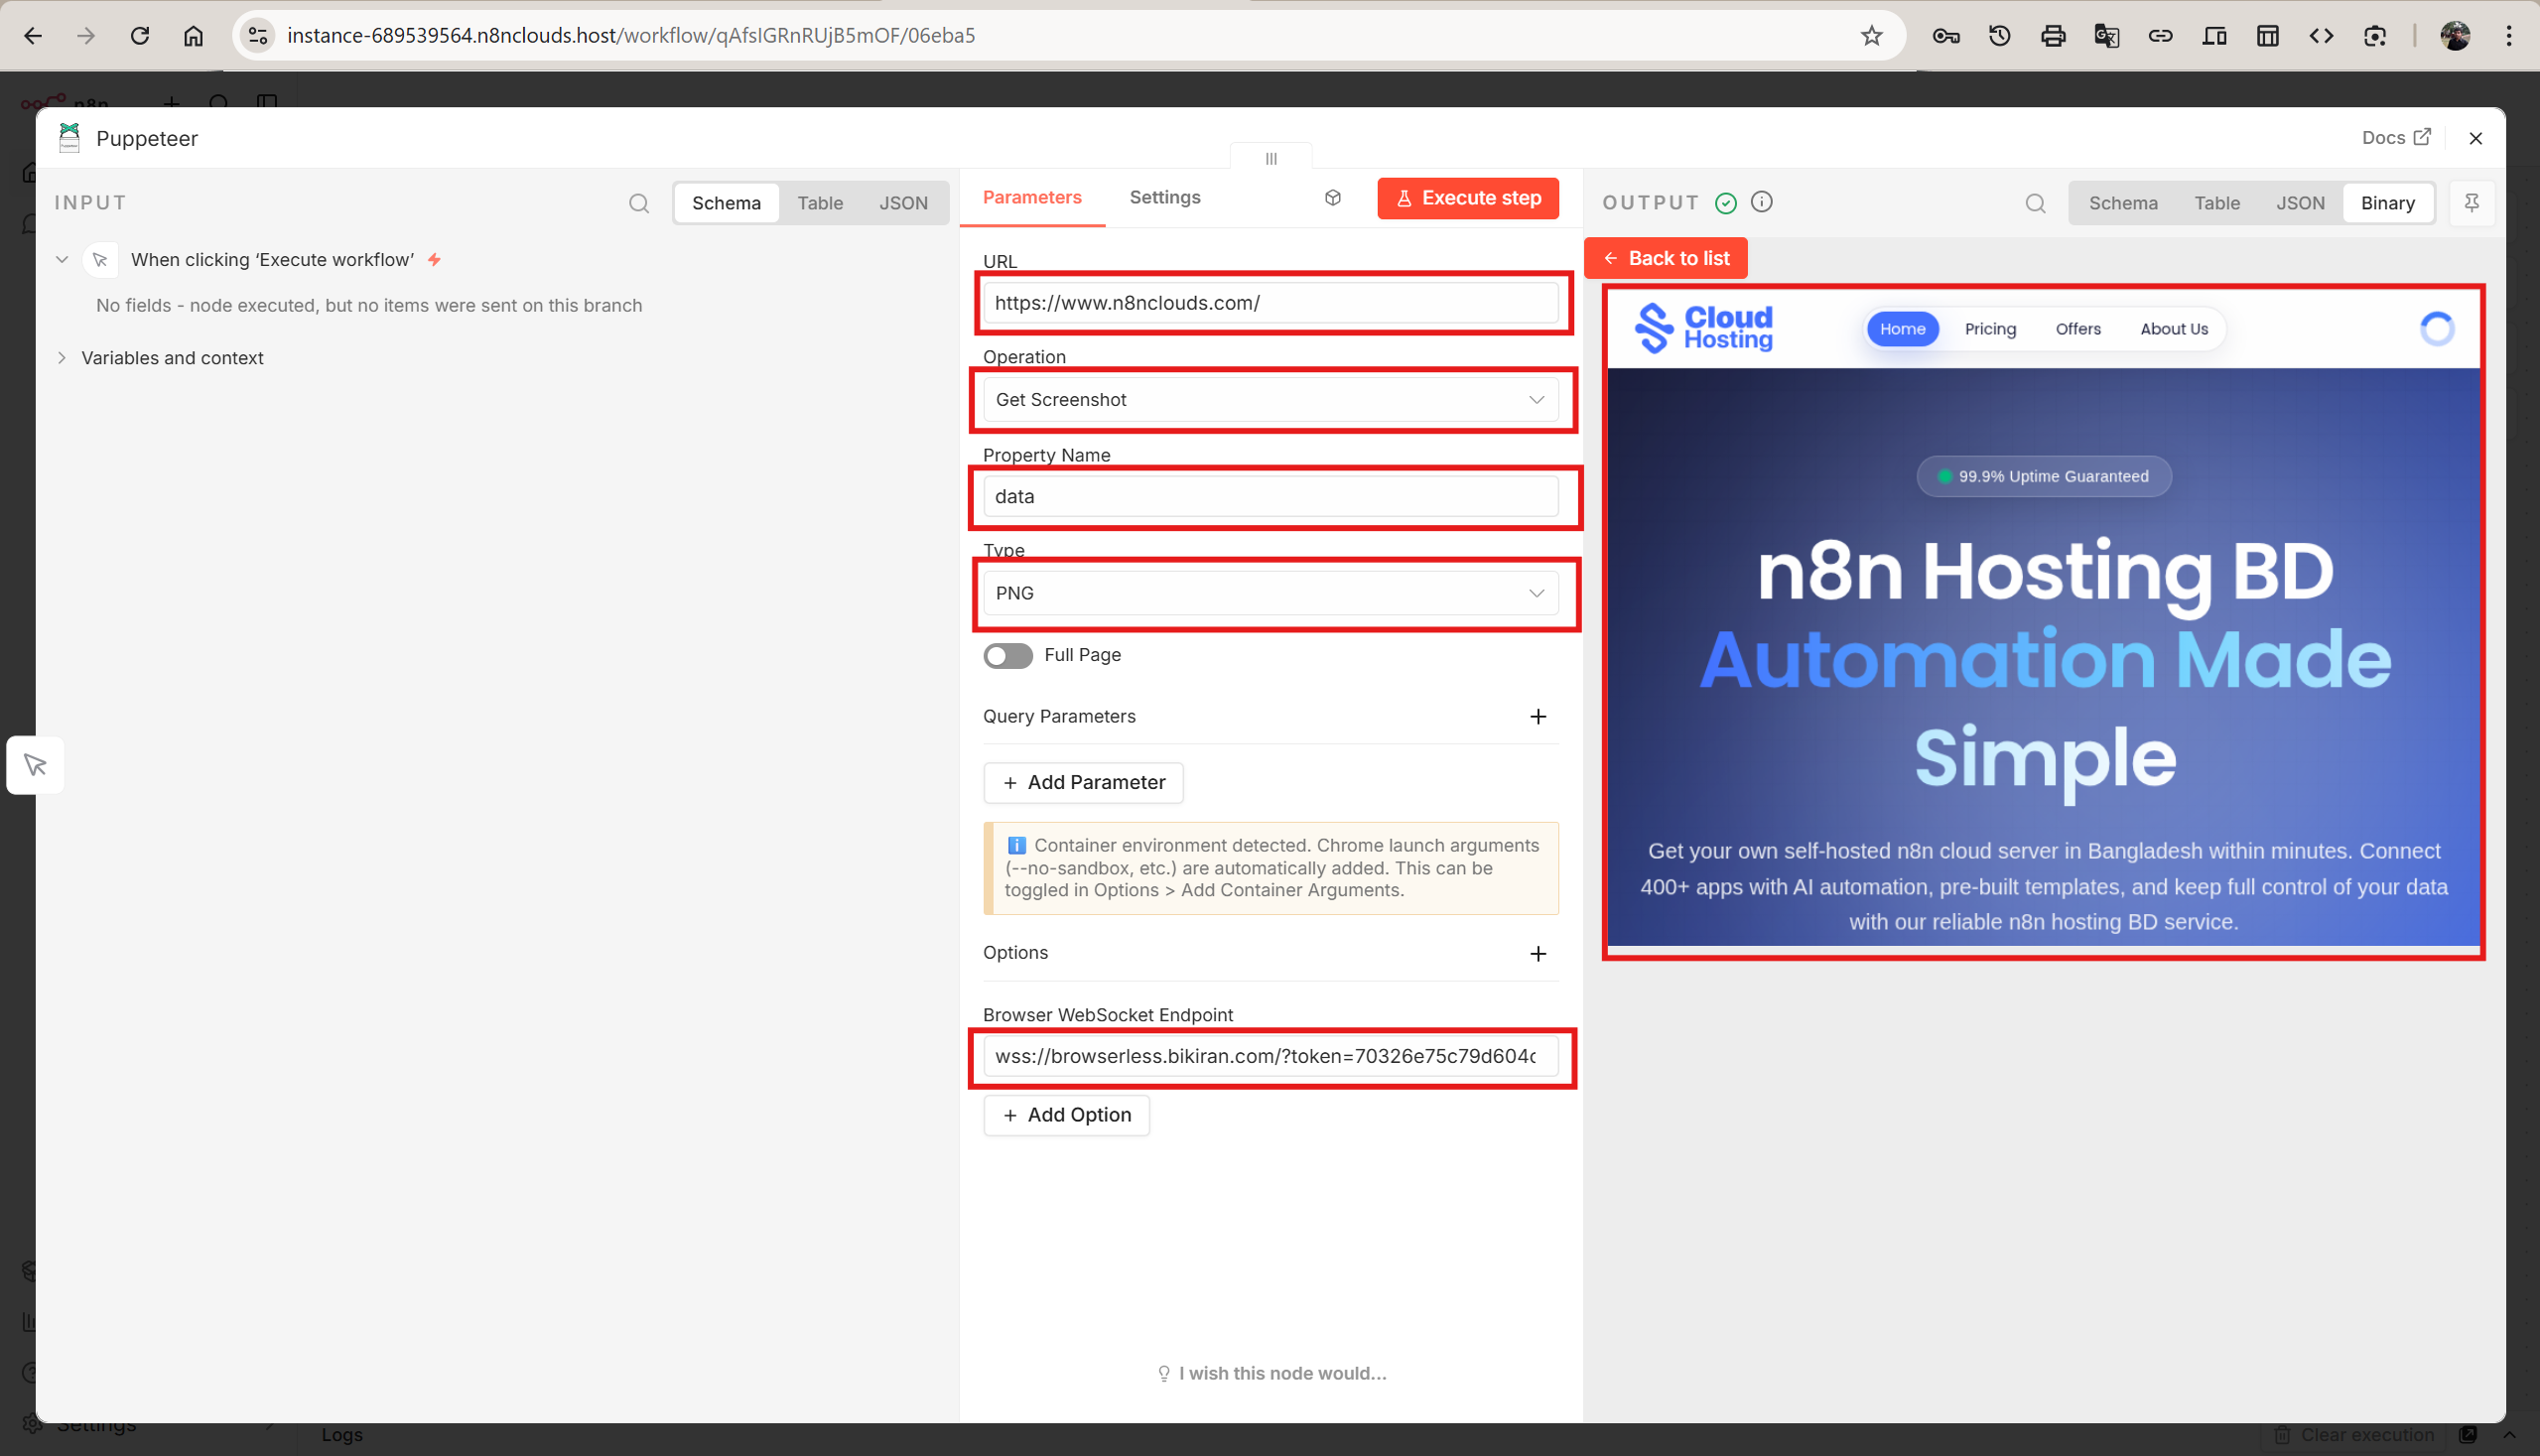
With the Puppeteer node open, configure the basic parameters:
- URL — Enter the web page you want to capture (e.g.,
https://www.n8nclouds.com/) - Operation — Select Get Screenshot
- Property Name — Leave as
data(the output key for the binary image) - Type — Choose PNG, JPEG, or WebP
Connect a Remote Browser (Required for Cloud Instances)
Since n8n Clouds instances run in containers without a local Chrome installation, you need to connect to a remote browser via WebSocket. Scroll down to the Options section and add a Browser WebSocket Endpoint.
Enter your remote browser's WebSocket URL. Popular options include:
| Service | Example WebSocket URL |
|---|---|
| Browserless | wss://chrome.browserless.io?token=YOUR_TOKEN |
| Self-hosted Browserless | ws://your-server:3000?token=YOUR_TOKEN |
| Browsercloud | wss://api.browsercloud.io?token=YOUR_TOKEN |
Tip: If you run Puppeteer frequently, set the
PUPPETEER_BROWSER_WS_ENDPOINTenvironment variable on your instance so every Puppeteer node connects automatically — no per-node configuration required.
Step 6 — Execute and See the Result
Click Execute step (or Execute workflow for the full chain). The Puppeteer node will navigate to your target URL, capture the screenshot, and return it as binary output.
Switch to the Binary tab in the output panel to preview the captured image.
That's it — you have a working Puppeteer screenshot workflow.
What Else Can You Do?
Once Puppeteer is installed, the possibilities go far beyond screenshots:
- Generate PDFs — Convert invoices, reports, or dashboards to PDF with custom page sizes, headers, and footers
- Scrape content — Extract HTML from any page for data pipelines and monitoring
- Run custom scripts — Write full Puppeteer code to fill forms, click buttons, log in, and navigate multi-step flows
- Emulate devices — Test how pages render on mobile, tablet, or specific screen sizes
- Use stealth mode — Avoid bot detection when scraping sites that block headless browsers
- Capture downloads — Automatically grab files triggered by user interactions during script execution
- Integrate with AI agents — Let n8n AI agents dynamically generate Puppeteer scripts using
$fromAI()
Troubleshooting
| Issue | Solution |
|---|---|
| Node does not appear in search | Restart your n8n instance after installation |
| Screenshot is blank or empty | Ensure the Browser WebSocket Endpoint is set and the remote browser is running |
| Connection timeout errors | Check that your WebSocket URL is correct and the browser service is reachable from your n8n instance |
| Missing shared library errors | Use a remote browser instead of local Chrome — this is the recommended approach for cloud deployments |
Summary
Installing the Puppeteer community node on n8n takes just a few clicks:
- Go to Settings → Community Nodes → Install
- Enter
n8n-nodes-puppeteerand click Install - Add the Puppeteer node to any workflow
- Connect a remote browser via WebSocket
- Start capturing screenshots, PDFs, and more
If you are running your n8n instance on n8n Clouds, the remote browser setup works out of the box — just provide your WebSocket endpoint and you are ready to automate.